NexHealth Support

Customize patient forms
NexHealth sets you up with all the right forms to collect vital patient information. Customize our templated forms, or send us your forms to digitize.
Choose from our wide selection of templated forms and edit them to fit your preferences, or send us your existing forms and we will digitize and add them to your platform.
To customize patient forms
- Navigate to Forms from the NexHealth Home page.
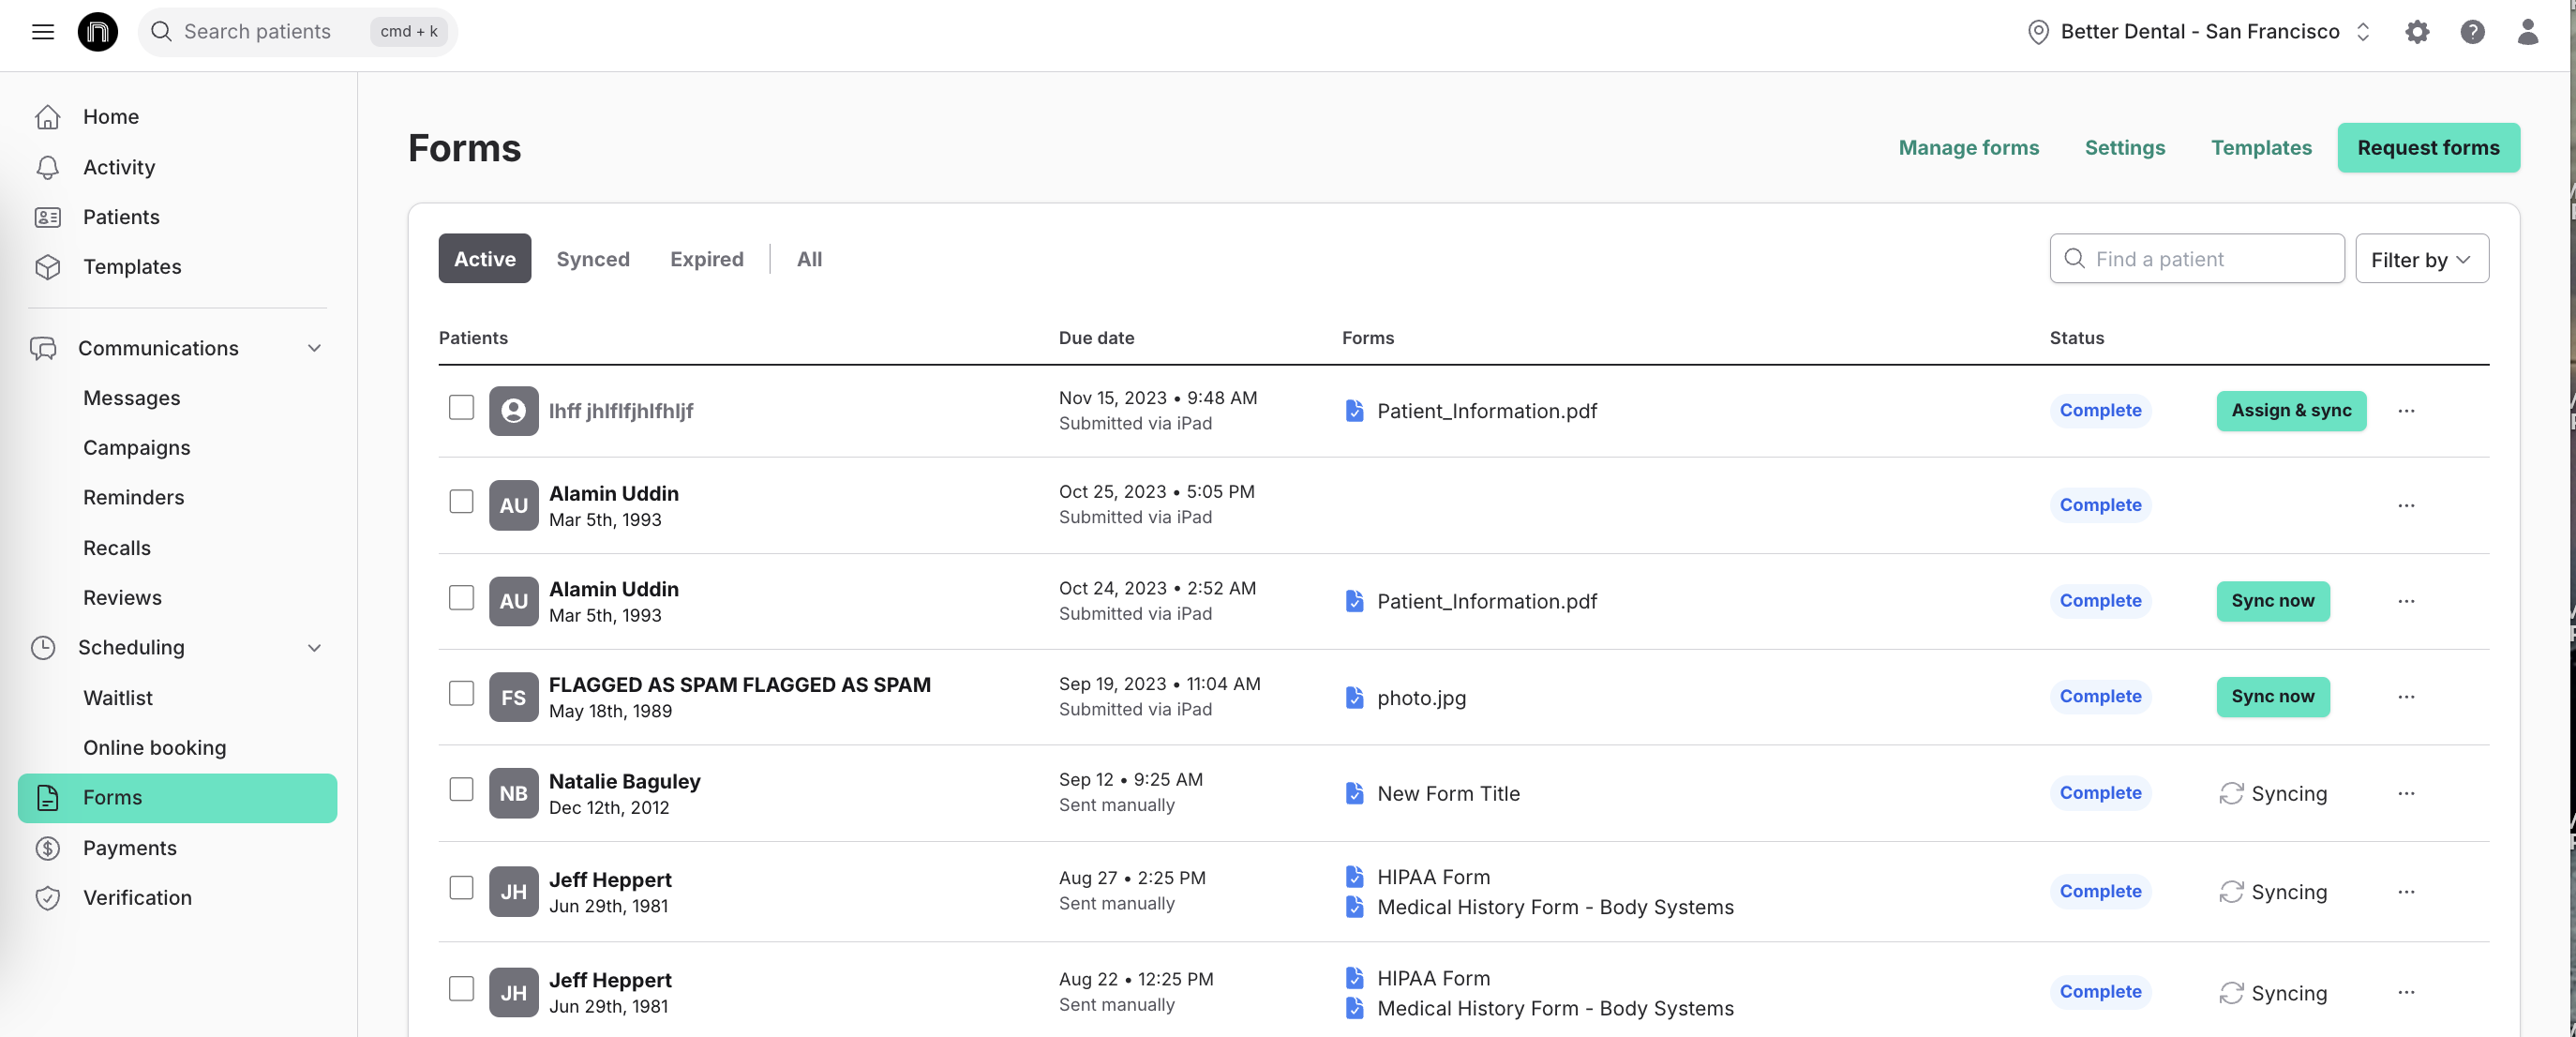
2. Click on Manage Forms.

3. Select New Form
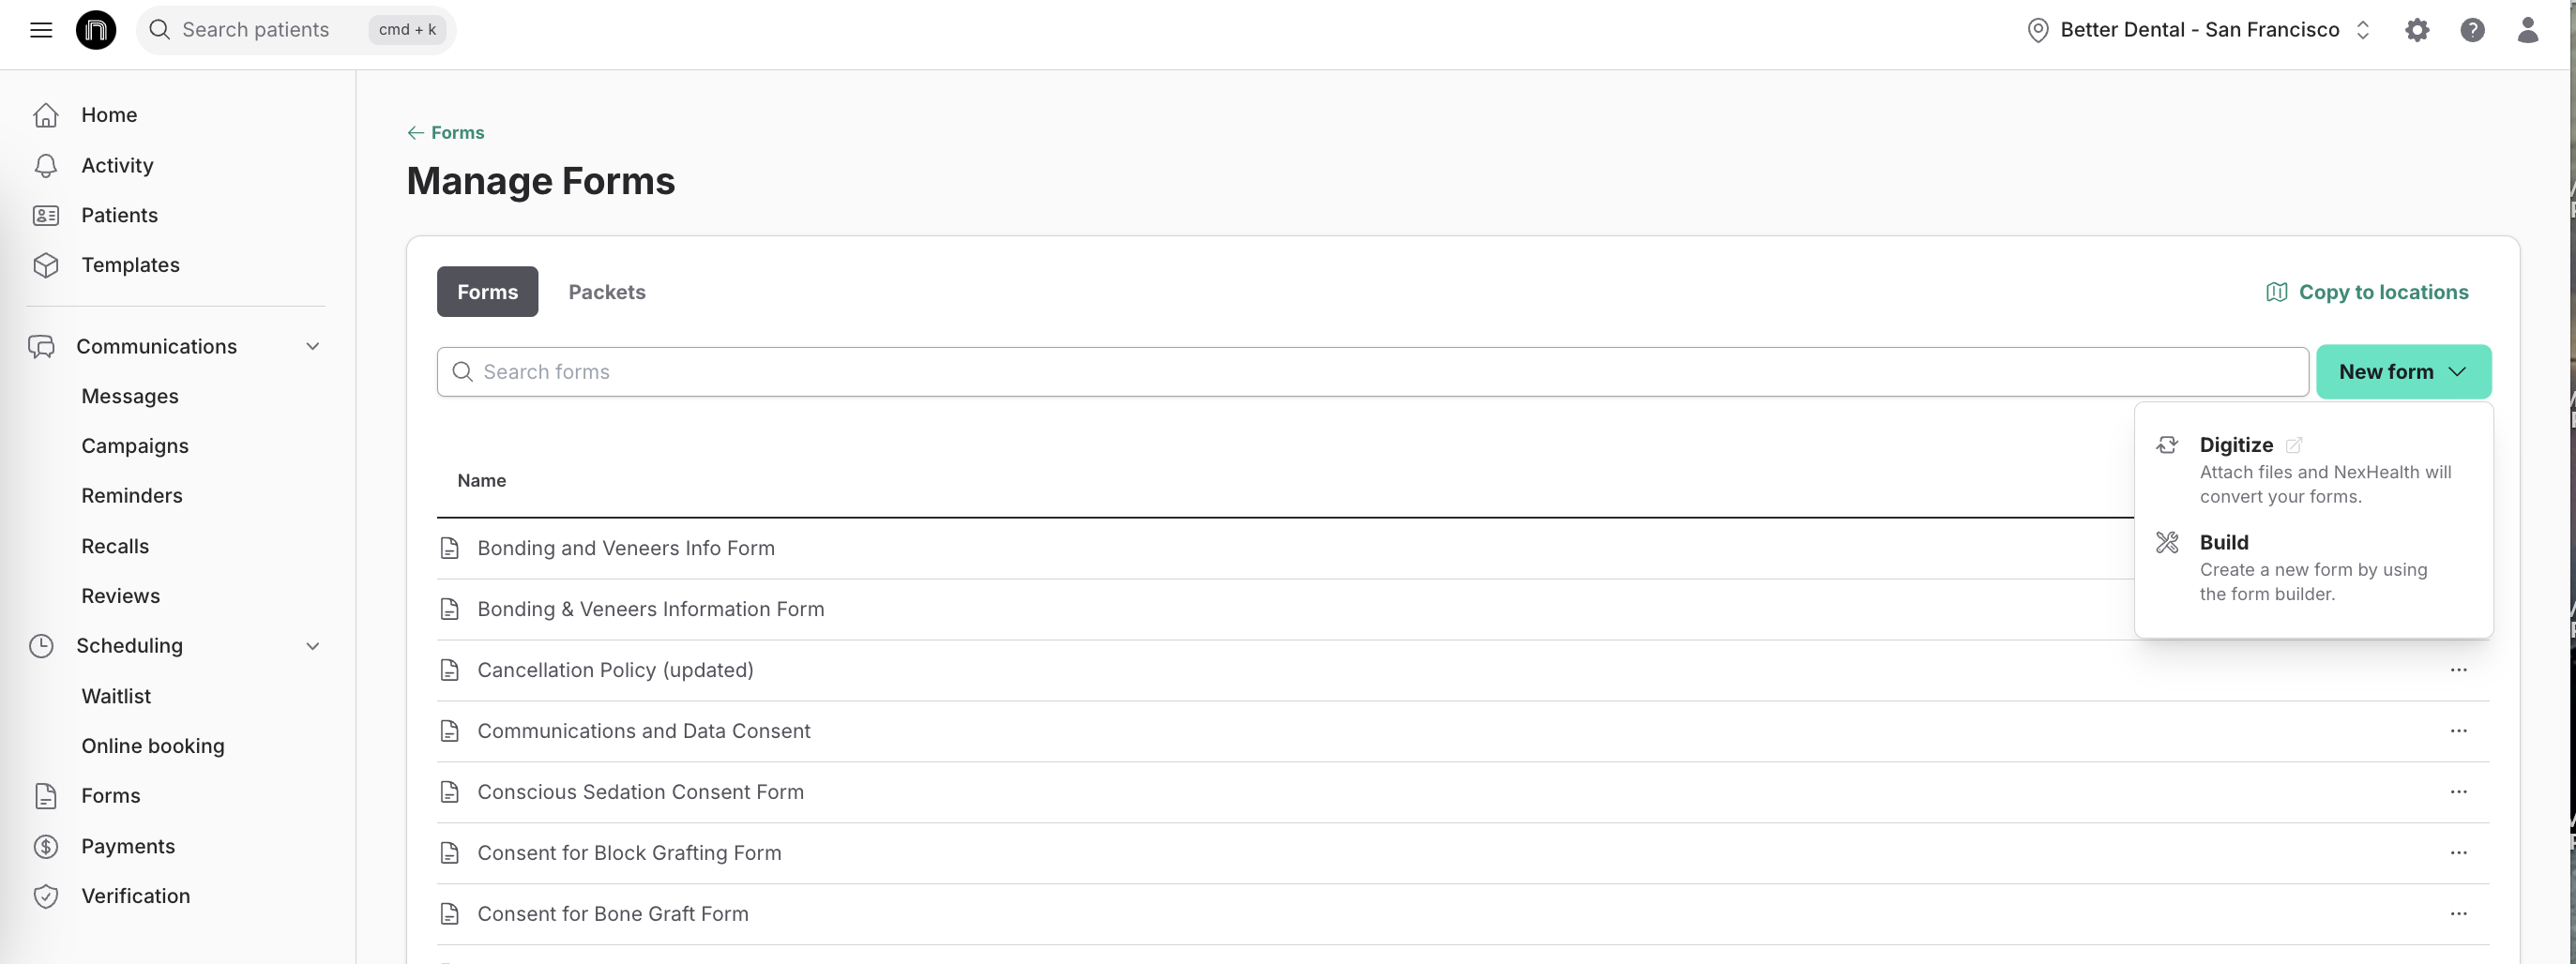
4. To have an existing form digitized, click Digitize.
5. Fill out the request and upload your form, then, click Submit. Your form will be digitized and will be available in your account within 72 business hours.
6. To get a head start with one of our form templates, select Build.
7. Click on the Select a Template dropdown to view the selection of customizable templates.
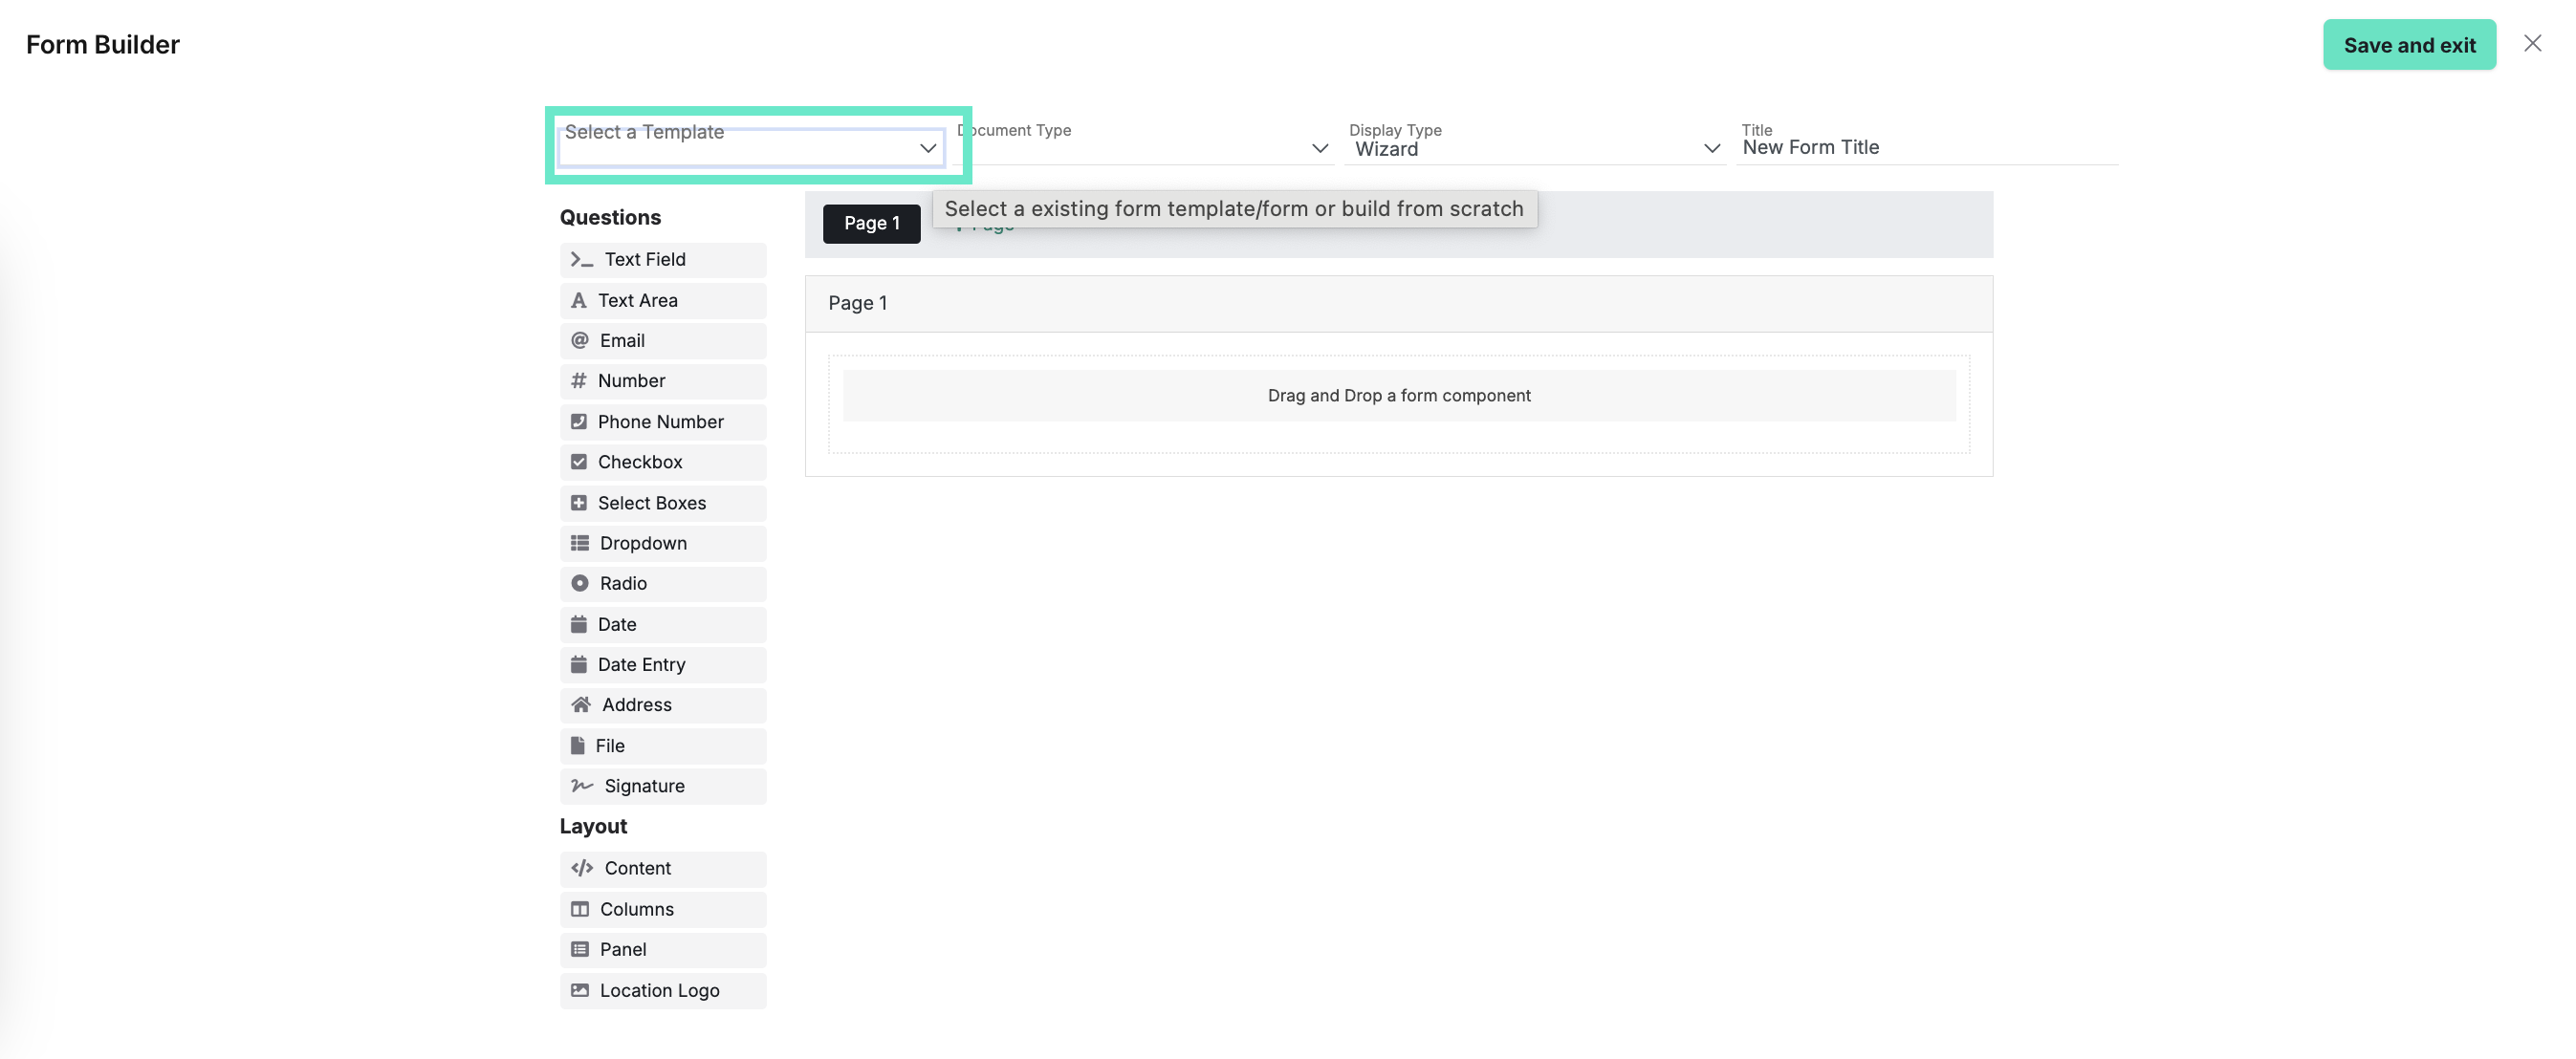
8. To edit a field within the template, click the gear icon.
9. Remove a field using the red X icon.
10. When finished, click Save and exit. This will take you back to the Manage forms page.
11. To view the form from the patient's perspective, click on the ellipsis (...) to the right of the form name, and then select Preview.
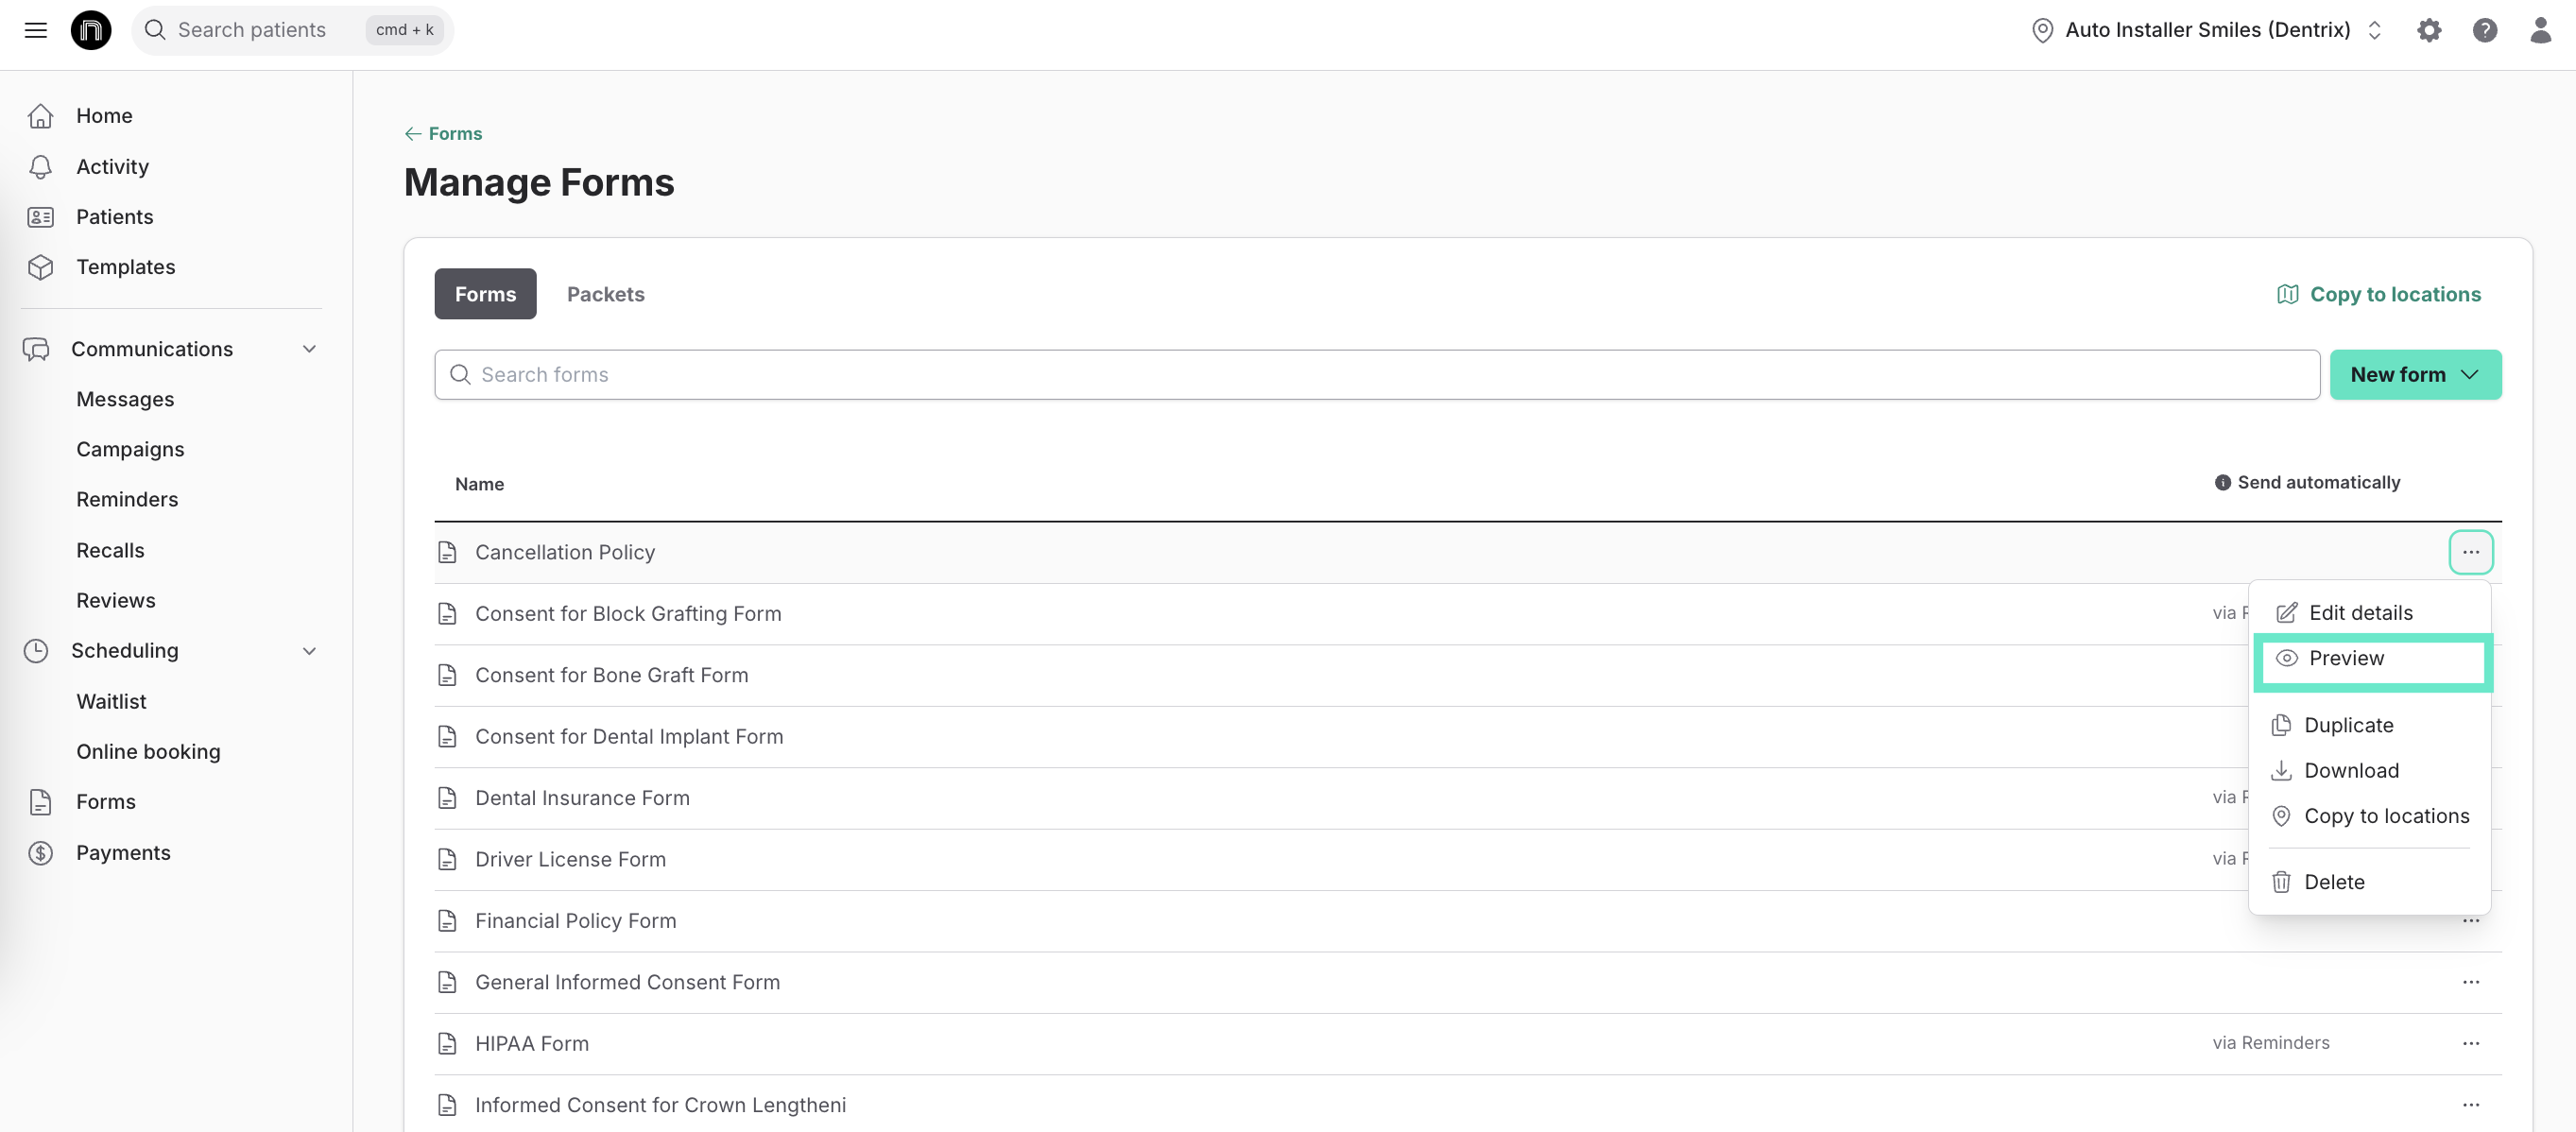
12. You can also create packets, or groups of forms which are commonly sent together.
To create a new packet
1. Switch to the Packets tab then click New packet.

2. Give the packet a title the staff will recognize, for example, "New Patient."
3. Then, add the forms to your packet by clicking the Add forms to packet field.
4. Finally, click Save.

Need to add the same forms to multiple locations?
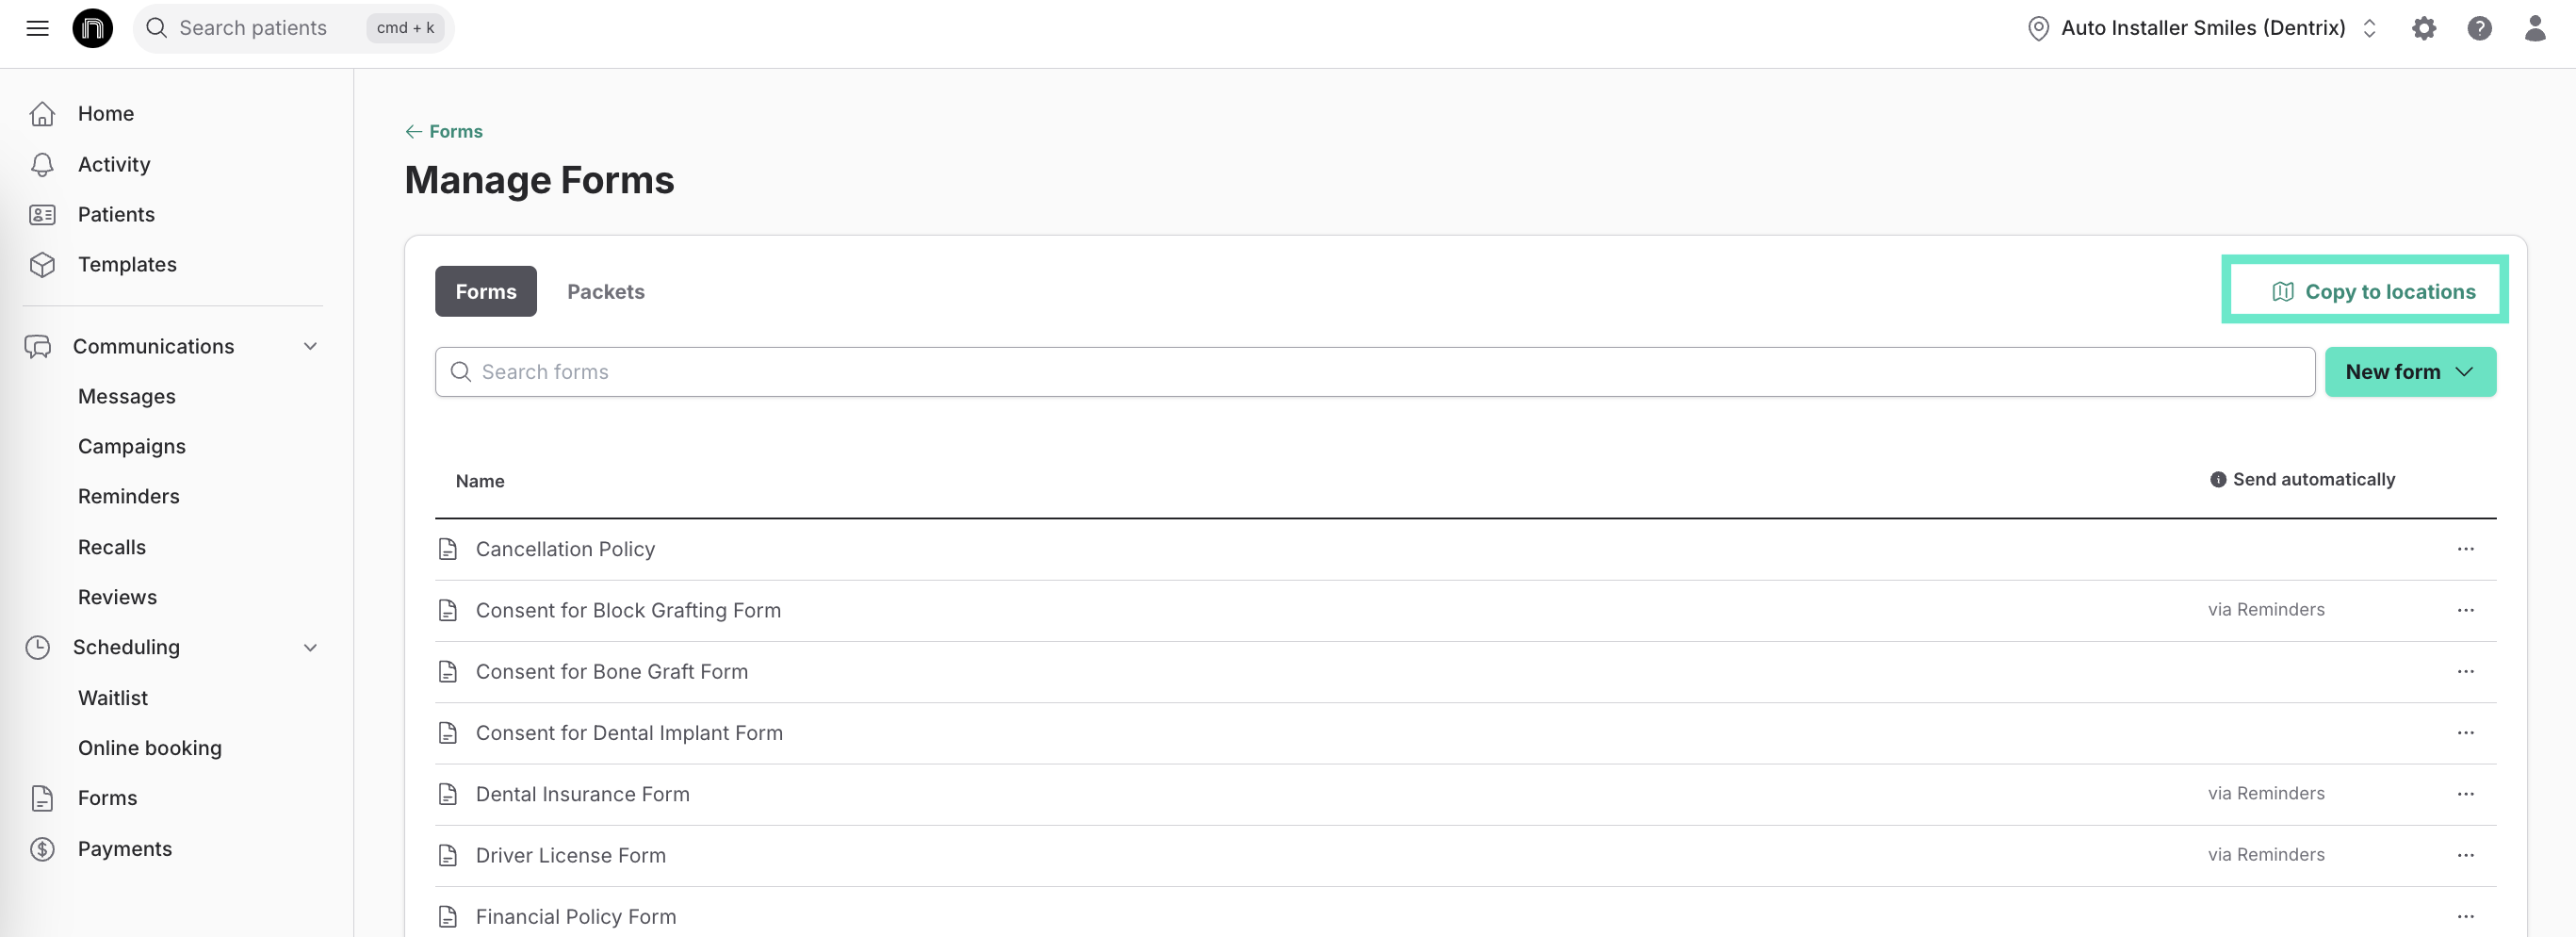
1. Navigate to Forms, then select Manage Forms. Click on Copy to locations.
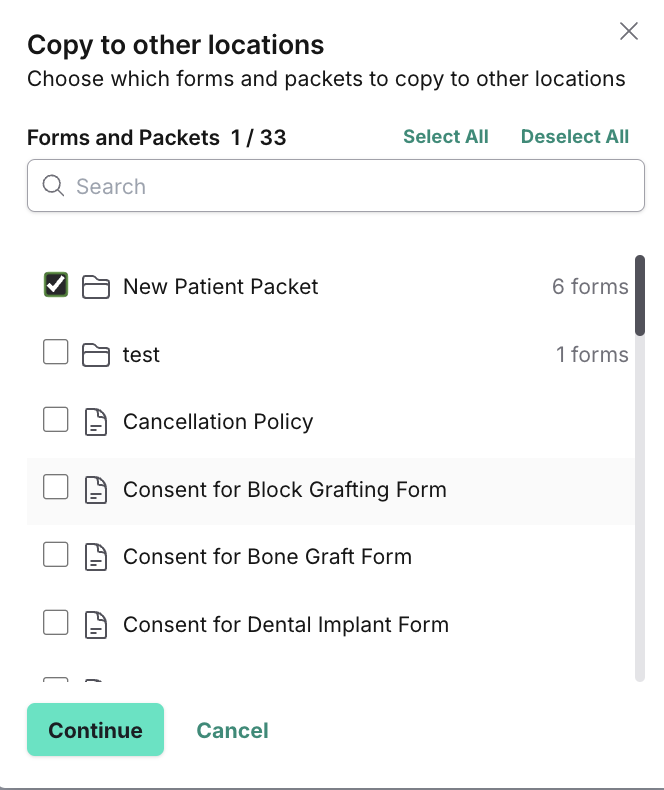
2. Use the check-boxes to indicate which forms and/or packets you would like to copy and click Continue.
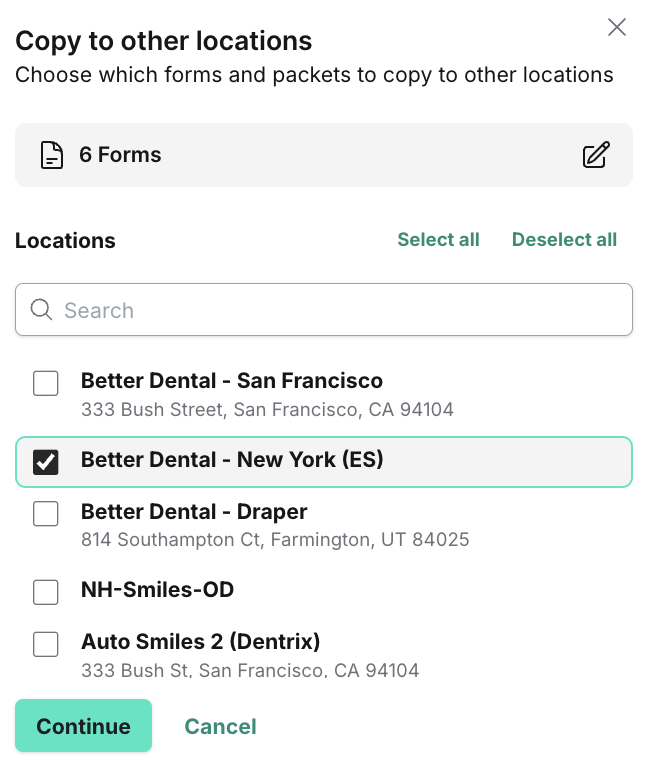
3. Then select the check boxes next to the Locations you would like to copy the forms and or templates to and click Continue.
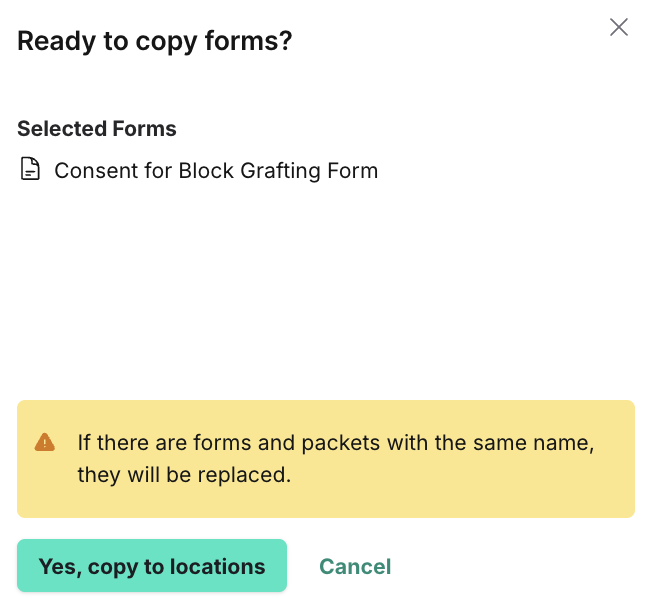
4. Confirm your selection and choose Yes, copy to locations.
If you are interested in more advanced form editing, refer to this Help Center article.
_BestEstimatedROI_Roi.png)
_BestSupport_QualityOfSupport.png)


And I've used at least 6 others." - Shaye, Falmouth Dentistry