
_BestEstimatedROI_Roi.png)
_BestSupport_QualityOfSupport.png)


In addition to easy drag-and-drop functionality, NexHealth forms also come equipped with functionality for more advanced changes. While you are welcome to make any edits you feel comfortable performing, our team is also here to help!
To access form edits from NexHealth:
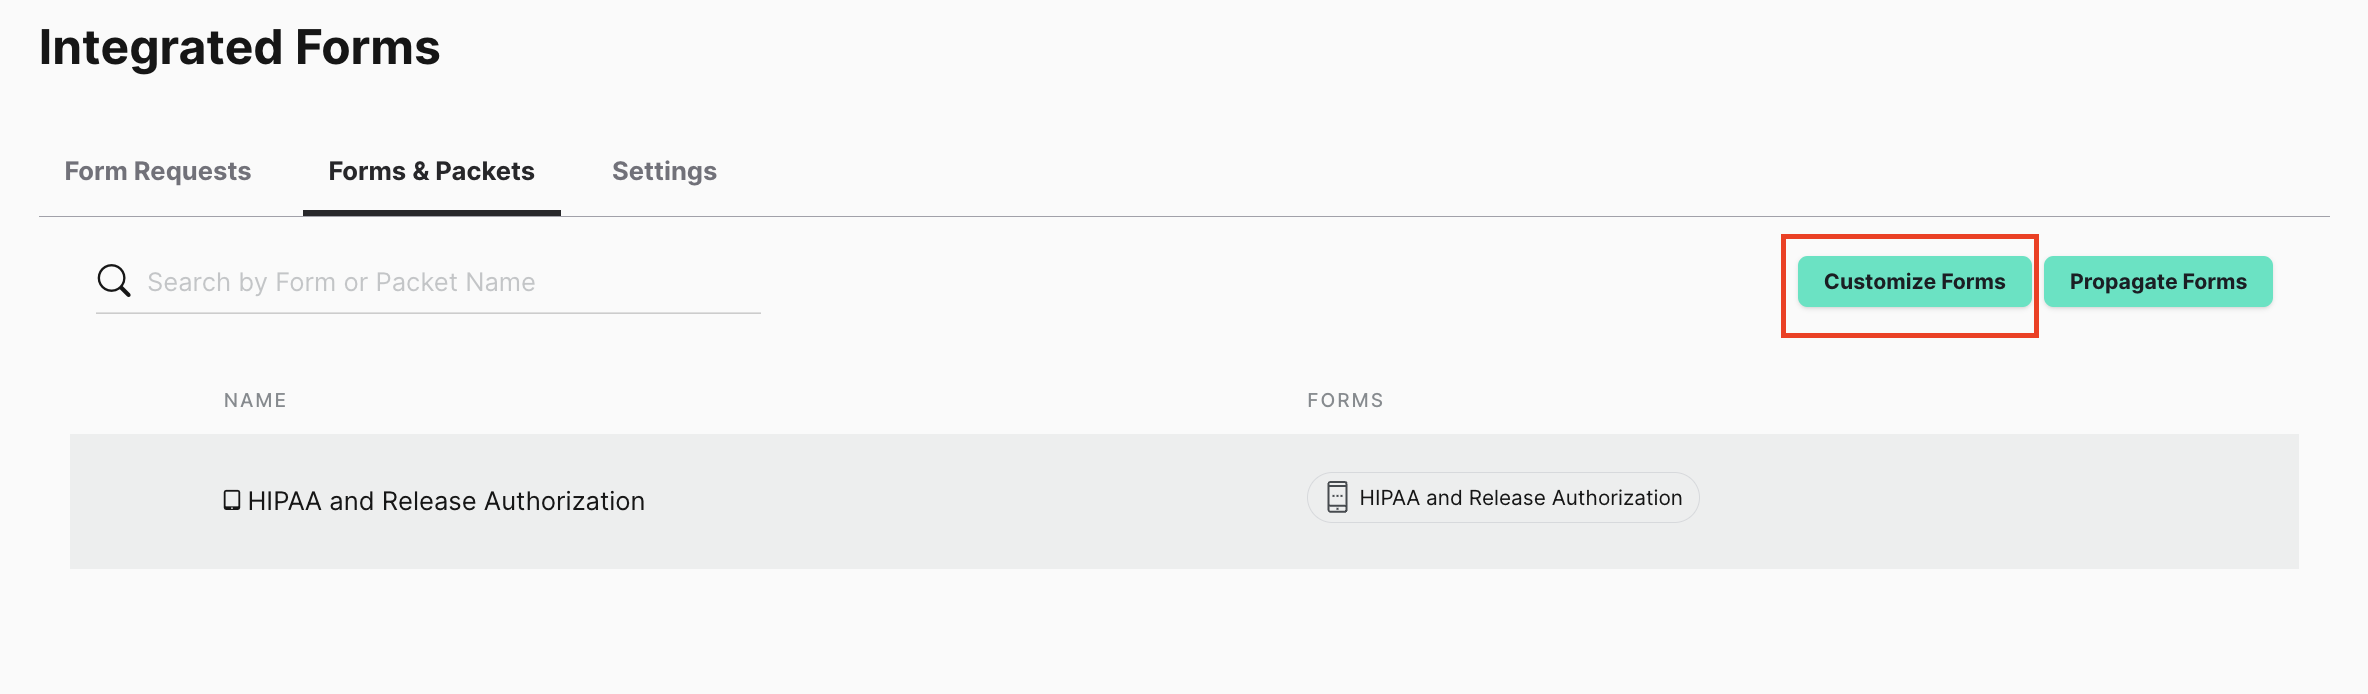
1. Navigate to the Forms tab.
2. Select Forms & Packets.
3. Then, choose Customize Forms. Note: This setting is only available for admins, if you do not see a Customize Forms button, you may not have the correct permissions.
What to Know:
Developer Mode
Developer Mode allows you to access more advanced and specific controls within your form. While Developer Mode is not necessary for everyday edits, it is recommended for many of the edits described below.
1. To turn Developer Mode on, simply open the form you would like to edit.
2. And toggle Developer Mode on (blue toggle) in the upper-left hand corner.
3. This will give you access when editing forms to Display, API, and Conditional menus within each form component. Most edits you will make will be in the Display and Conditional menus. Making changes to the API menu is not recommended.

Adding a Logo to the Tops of Forms
1. To add your logo at the top of your form, start by opening the Advanced Controls window at the left side of your form editor. Select Content.

2. Drag the Content block to the top of the form.
3. This will open the Content Component editor. Insert the image and adjust to fit.

Add Fields with the Control Menu
In addition to editing existing fields, you can also use the Control Menu at the left of the Forms Editor screen to add additional fields.
1. To add a field, drag the component type you'd like to include into the form.
2. The Control Menu includes two groups: Basic and Advanced.
3. The Basic menu includes:
- Text Field: allow you to ask a basic question of a patient and provide them a space to write a short answer. (Ex: Patient First Name)
- Text Area: like text fields, text areas allow you to ask a question of a patient and provide them space to write an answer. However, these are used for longer answers, as they provide a comparatively large space to type. (Ex: Is there anything else we need to know about this appointment?)
- Number: used to collect basic numbers from patients in their form. However, if the number you are looking to collect is a phone number, we recommend using the Phone Number field from the advanced menu. (Ex: Months since last cleaning)
- Checkbox: allows patients to check beside a label. (Ex: Check here if you agree to the policy above)
- Select Boxes: enables a patient to select multiple boxes in a list of choices you define. (Ex: Select allergies below)
- Select: allows a patient to select one or more options form a dropdown menu. (Ex: How did you hear about us?)
- Radio: allows a patient to choose just one of two defined options. (Ex: Yes or No)
4. The Advanced menu includes:
- Email: used to collect email information from a patient and includes a validation for email formatting.
- Phone number: used to collect a phone number from a patient and includes a validation for the correct number of digits
- Date - calendar: prompts a patient to type a date or select one from a calendar (Ex: date of birth)
- Day - menus: prompts a patient to enter a date from a series of dropdowns for Month, Day, then Year.
- Content: used to include a large block of content which doesn't require any information to be entered, for example, if you wanted to include your HIPAA policies.
- Columns: creates placeholders for you to add additional components in a column format, making use of the space on the page.
- Panel: Adds a heading to a group of components, enabling you to sort the page and indicate related pieces to patients. (Ex: a financial section in your policies form, separate from your cancellation policies)
- Table: allows you to create placeholders in a table format with a defined number of rows and columns.
- Survey: allows you to create a series of questions in a survey format, as seen below.
- Signature: enables the patient to sign the form using their cursor or finger, if they are using a touch screen.
Conditional Formatting
Conditional formatting the content of a form to change based on answers the patient provides. For example, if a patient indicates they are a minor, conditional formatting could allow for guardian information to be added. This can streamline the form-filling process and gather more information when a question requires a follow-up.
1. To begin, open the form you'd like to edit and enable Developer Mode.
2. Edit the field that you would like the condition to be read from. (e.g., the age question in the example below)

3. In the editor for your reading condition, go to the Data tab, and add the value that you would like to trigger the conditional fields.
4. Go to the API tab and write down the Field Name. (Note, we are just writing down the name here, there is no action required.)
5. Next, open the field that should appear/disappear when the condition we created above is met.
6. From the “This Component should Display:” dropdown, select True if you want the field to appear after the condition is met, or False if it should be hidden after it’s met.
7. In the “When the form component:” box, add the API Field Map name you wrote down earlier. (This is case sensitive)

8. In the “Has the value:” box, add the value you took from the Data tab. (This is case sensitive)
9. Save the changes you made. You can now test the form by clicking Save & View in the upper-right corner. This will allow you to view the form from the patient perspective.
Field Validations
Some controls in your form will allow you to validate the information the patient enters. This is especially helpful when collecting information like emails or phone numbers, where particular formatting may be required.

1. Fields with validations include the Email and Phone Number options in the Advanced control window.
- Email validates email format, including [email protected] format.
- Phone number validates the correct number of digits, including the area code.
And I've used at least 6 others." - Shaye, Falmouth Dentistry